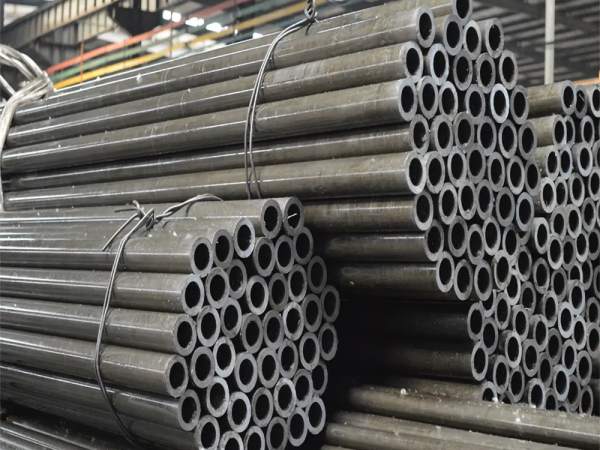
Cold-drawn steel pipes are widely used in machinery manufacturing, automotive components, hydraulic and pneumatic systems due to their high dimensional accuracy, tight tolerances, and excellent surface finish.
However, incorrect specification confirmation often leads to assembly failure, performance mismatch, rework, and schedule delays.
Best practice principle:
Clarify requirements first → verify specifications accurately → confirm application compatibility.
Below are six critical checkpoints for confirming cold-drawn steel pipe specifications.

1. Core Dimensional Specifications of Cold-Drawn Steel Pipes
Dimensions are the foundation of correct selection. Always confirm outer diameter (OD), inner diameter (ID) or wall thickness, and length.
(1) Outer Diameter & Inner Diameter (Wall Thickness)
Confirm nominal dimensions from design drawings
Verify tolerance grade, commonly:
H8 / H9 (OD tolerance) for cold-drawn steel pipes
Clearly distinguish between:
Standard precision
High-precision / hydraulic grade
Even small tolerance deviations may cause assembly interference.
(2) Length Specification
Cold-drawn steel pipes are supplied as:
Fixed length
Random length
Customized length
Key points:
For fixed lengths, confirm whether cutting allowance is included
For customized lengths, clearly define length tolerance to prevent:
Assembly conflicts
Material waste
2. Material Grade & Mechanical Properties
Material selection directly determines strength, fatigue resistance, corrosion performance, and service life.
(1) Material Grade Confirmation
Common cold-drawn steel pipe materials:
Carbon steel: 20#, 45#
Alloy steel: 20Cr, 40Cr
Stainless steel: 304, 316L
Procurement requirement:
Request Material Test Certificate (MTC)
Verify chemical composition compliance to avoid grade substitution
(2) Heat Treatment Condition
Typical delivery conditions:
Cold-drawn (as-drawn)
Annealed
Quenched & tempered
Selection depends on:
Subsequent machining
Load conditions
Bending or welding requirements
(3) Mechanical Properties
Confirm key parameters:
Tensile strength
Yield strength
Elongation
For critical applications:
Require sampling tests
Prevent hidden performance risks
3. Surface Quality & Dimensional Precision Requirements
Surface quality and geometry directly affect sealing performance, motion stability, and system cleanliness.
(1) Surface Roughness (Ra)
Typical references:
General cold-drawn pipes: Ra ≤ 1.6 μm
Precision hydraulic pipes: Ra ≤ 0.8 μm
Mirror finish: Ra ≤ 0.4 μm
Inspect for:
Oxide scale
Cracks
Scratches
Dents
Inner-wall burrs or impurities (critical for hydraulic systems)
(2) Geometric Accuracy
Key indicators:
Roundness
Straightness
Cylindricity
Typical limits:
Standard grade:
Roundness ≤ 0.05 mm/m
Straightness ≤ 1 mm/m
Precision grade:
Roundness ≤ 0.02 mm/m
Straightness ≤ 0.3 mm/m
4. Application Matching & Working Conditions
Cold-drawn steel pipes must be matched to actual service conditions.
(1) Pressure Conditions
Confirm working pressure
Select appropriate wall thickness & material
For pressure systems, request:
Hydrostatic test report (if applicable)
(2) Corrosive Environment
For humid, acidic, alkaline, or high-temperature environments:
Verify corrosion resistance
Consider stainless or alloy grades
(3) Subsequent Processing Requirements
If welding, bending, or threading is required:
Confirm material formability
Prefer annealed pipes for bending
Avoid fracture risks from excessive cold-work hardness
5. Supplier Qualification & Inspection Control
Market risks include non-standard pipes falsely labeled as compliant.
(1) Supplier Qualification Review
Select manufacturers with:
Valid production licenses
Quality management systems
Product certificates & QA documents
(2) Incoming Inspection
Recommended checks:
OD & wall thickness → calipers / micrometers
Length → steel tape
Surface roughness → roughness tester
Straightness → straightedge & dial indicator
For critical uses:
Third-party testing for material & mechanical properties
6. Key Points in Procurement Communication
Clear communication prevents costly mistakes.
(1) Specify the Standard
Clearly state applicable standards (ASTM, EN, DIN, GB, etc.)
Avoid default assumptions
(2) Standardize Units
Use consistent units (mm, MPa, etc.)
Prevent conversion errors
(3) Allow Processing Allowance
Inform suppliers if machining is required
Prevent undersized delivery after processing
Summary
Confirming cold-drawn steel pipe specifications requires systematic verification across dimensions, material, surface quality, application conditions, and supplier credibility.
Following a structured confirmation process significantly reduces assembly failure, performance risks, and procurement disputes, ensuring reliable and cost-effective project execution.
FAQ
Q1: What tolerances are common for cold-drawn steel pipes?
A: OD tolerances typically follow H8 or H9 grades.
Q2: Why is surface roughness important for hydraulic pipes?
A: Poor surface finish can damage seals and contaminate hydraulic systems.
Q3: Should cold-drawn pipes be annealed before bending?
A: Yes, annealed pipes offer better ductility and reduce cracking risk.
Q4: How do I verify cold-drawn steel pipe material grades?
A: Always check the Material Test Certificate (MTC).
Q5: Can non-standard pipes meet national standards?
A: Some may not; supplier qualification and inspection are essential.