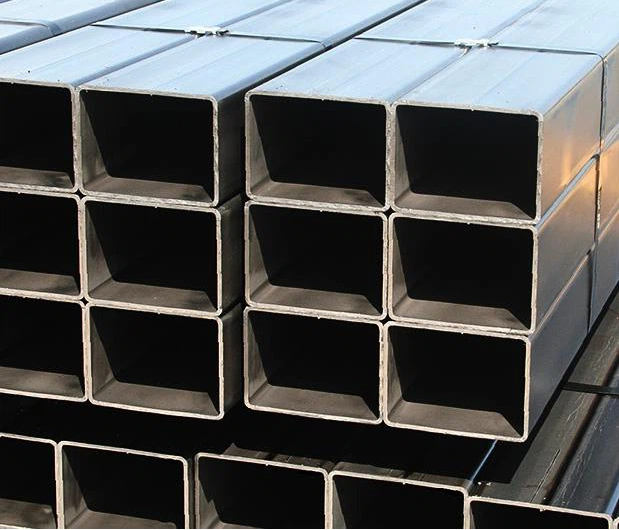
ASTM A500 Tubing,ASTM A500 Structural Pipe

Date:2023-06-02View:449Tags:ASTM A500 Tubing,ASTM A500 Structural Pipe,Round Structural Tubing,Shaped Structural Tubing
Standard Specification for Cold-Formed Welded and Seamless Carbon Steel Structural Pipe for Round Bars and Sections
Scope
This standard covers cold-welded seamless carbon steel round, square, rectangular, or specially shaped structural pipe for welded, riveted, or bolted construction of bridges and buildings, and general structural pipe.
This pipe is welded and seamless pipe with an outer circumference of 88 inches (2235 mm) or less and a wall thickness of 0.875 inches (22 mm) or less. Grade D requires heat treatment.

Products produced to this standard may not be suitable for use in welded structures such as dynamically loaded elements where low temperature notch toughness may be important, etc.

Chemical Composition Requirements(Table 1)

Composition, %
Element Grades A, B and D Grace C
Heat
Analysis
Product
Analysis
Heat
Analysis
Product
Analysis
Carbon, max
0.26 0.30 0.23 0.27
Manganese, max
... ... 1.35 1.40
Phosphorus, max
0.035 0.045 0.035 0.045
Sulfur, max
0.035 0.045 0.035 0.045
Copper, when copper steel
is specified, min
0.20 0.18 0.20 0.18

processing

  • 1. Steel should be processed according to one or more of the following: open hearth steelmaking, oxygen blowing, or electric furnace steelmaking
  • 2 When different grades of steel are cast sequentially, the steel producer should determine the condition of intermediate material and remove it using routine procedures to clearly separate the grades.


Manufacturing

  • 1 It shall be a pipe produced in a seamless or welded manner
  • 2 Welded pipes are to be manufactured from rolled steel by resistance welding. Longitudinal butt joints of welded pipes shall be welded through their thickness using the structural design strength of the pipes as determined method.
  • 3 In addition to the requirements of 6.4, stress relieving and annealing of tubes are permitted.
  • 4. Class D pipe shall be heat treated at a minimum of 1100°F (590°C) per inch (25 mm) per hour.


Thermal Analysis
Each thermal analysis shall be done in accordance with the specific requirements for thermal analysis in Table 1.


Product analysis

  • 1 The tube shall comply with the requirements of the product analysis specified in Table 1.
  • 2 For product analysis, take two unit lengths or two-part samples for every 500 unit lengths of tubing. Or two flat bars in the corresponding number of flat bars. Methods and practices pertaining to chemical analysis shall be consistent with Test Methods, Practices, and Terminology in A751. Product analysis shall be done in accordance with the product analysis requirements specified in Table 1.
  • 3 If both product analyzes comply with the requirements and fail, all products will be deemed unqualified.
  • 4 If only one product fails the analysis, follow the instructions and take two supplementary samples from it. Both of these supplementary product analyzes must comply with the requirements of the instructions, otherwise all products will also be identified

Rally requirements
The material used as the sample must comply with the requirements specified in Table 2 for tensile properties.


Flattening test

  • 1 The flattening test is required for circular structural pipes, but not for other shapes of structural pipes.
  • 2 For round welded pipe, the specimen shall be cold flattened in three steps between two parallel plates, with the weld at 90° to the direction of force, at least 4 inches (100 mm). In the first step, a ductility test is performed on the weld, with no cracks or breaks on the inner and outer surfaces of the test piece, until the distance between the two plates is less than two-thirds of the outside diameter of the pipe. In the second step, there shall be no cracks or breaks on the inner and outer surfaces of the parent metal until the distance between the two plates is less than half the outside diameter of the tube, except as specified in 10.5. In the third step, the soundness test, the flattening action is continued until the specimen breaks or the opposite pipe walls of the specimen come into contact. Thinner, less strong stock, or incomplete welds will show up throughout the flattening test and will be considered a failure of the product.

Round Structural Tubing Tensile  Requirements( Table 2 )

Round Structural Tubing

Grade

Grade A

Grade B

Grade C

Grade D

Tensile strength, mn, ps (MPa)

45 000
(310)

58 000
(400)

62 00
(427)

58 000
(400)

Yield strength, mn, psi (MPa)

33 000
(228)

42 000
(290)

46 000
(317)

36 000
(250)

Elongation in 2 in. (50.8 mm), min, %A

25B

23C

21D

23C


Round Structural Tubing


Shaped Structural Tubing Tensile  Requirements( Table 2 )

Shaped Structural Tubing

Grade

Grade A

Grade B

Grade C

Grade D

Tensile strength, mn, ps (MPa)

45 000
(310)

58 000
(400)

62 00
(427)

58 000
(400)

Yield strength, mn, psi (MPa)

39 000
(269)

46 000
(317)

50 000
(345)

36 000
(250)

Elongation in 2 in. (50.8 mm), min, %A

25B

23C

21D

23C


Shaped Structural Tubing

  • For tubes of seamless circular construction, 23/8" (60 mm) outside diameter and larger, the specimen length shall not be less than 21/2" (65 mm) between two parallel plates in two steps. Cold flatten. In the first step, the ductility test, there are no cracks or breaks on the inner and outer surfaces, until the distance between the two plates is less than the H value, except for the conditions specified in 10.5, the calculation formula is as follows:
H=(1+e)t/(e+t/D) (1)
H= distance between platens, inches (mm),
e=deformation per unit length (fixed value by grade, A grade 0.09, B grade 0.07, C grade 0.06) t=specified wall thickness, inches (mm)
D = Specified pipe outside diameter, inches (mm)
In the second step, the soundness test, the flattening action is continued until the specimen breaks or the opposite pipe walls of the specimen come into contact. Thinner, less strong stock, or incomplete welds will show up throughout the flattening test and will be evidence of failure of the product.
  • Defects on the surface of the tube are not apparent until the sample has been subjected to the flattening test, but can be shown in the first part of the flattening test, which can be judged by referring to Section 15.
10.5 When the pipe with a low ratio of outer diameter and wall thickness is tested, due to the unreasonably high increase in geometric tension, the crack is at the position of 6 o'clock and 12 o'clock on the inner surface, which cannot become a ratio of outer diameter and wall thickness less than 10 The reason for the failure of the tube.

Request A Quote?

If you have business needs or inquiries, you can leave a message to us. We'll get back to you as soon as possible.
We use cookies and other tracking technologies to improve your browsing experience on our website, to show you personalized content and targeted ads, to analyze our website traffic, and to understand where our visitors are coming from.